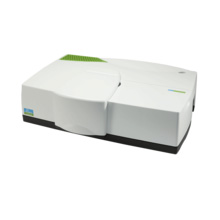
Avian Technologies offers measurement services for reflectance of both specular and diffuse materials in the UV-Vis-NIR region of the spectrum.
Our typical measurement equipment includes two Perkin-Elmer Lambda-9/19 spectrophotometers: the same instruments that are used in many national laboratories for measurement and calibration of artifacts for diffuse reflectance, specular reflectance and transmittance. Depending on the application we also employ a 150 mm integrating sphere accessory (diffuse reflectance, relative near-normal, specular reflectance and color measurements), a 75 mm integrating sphere (UV-Vis-NIR reflectance, diffuse and total transmittance) or the standard collection geometry (normal transmittance).
We can also provide measurements at d:8° (specular included) and d:0 degree (specular excluded) geometries, employing Minolta CM-3610d and CM-3630d spectrophotometers, respectively. These instruments are primarily used for the measurement of color of solids such as paint or textiles.
Services offered:
- Total Hemispherical Reflectance (8°:d) from 250-2500 nm
- Measurements are traceable to National Research Council, Canada (we can measure to 230 nm, but measurements below 250 nm are not traceable).
- Bandpasses from 1 to 5 nm are available.
- Relative Specular Reflectance at near normal incidence (8°).
- Measurements are traceable to National Research Council, Canada
- Color measurements at d:8° or d:0° geometry.
Measurement services are performed on materials to determine their reflectance over a particular wavelength range under defined optical conditions. As the materials may be dependent on sample preparation, these cannot be considered ‘calibrations’, although the measurement techniques used are those outlined for calibrations*.
Logistics
All measurements are charged with a fixed setup fee, which includes instrument set up, calibration, verification, and documentation, plus a fee for each set of measurements. Quantity discounts are available. Contact us for pricing information for both standard and custom measurement services.
We pride ourselves in the quick turnaround of highly accurate and traceable measurements, typically within one week of receiving samples.
All data is reported in either 10 or 25 nm increments at 1 nm (UV-Vis) or 5 nm (UV-Vis-NIR) increments. Graphical data is presented. All samples are double or triple scanned and averaged.
References
“Non-Standard Spectroscopic Measurements” A. Springsteen, Spectroscopy Magazine 12(5), 26-30 (1997)
“Techniques for the Measurement of Specular Reflectance” A. Springsteen, Spectroscopy Magazine 12(8), 24-28 (1997)
“Standards for Reflectance Measurements, Parts I and II” A. Springsteen, Spectroscopy Magazine 15(5), 21-27 (2000); 15(6), 22-25 (2000)
*Calibration is defined as the measurement and certification of ‘artifacts’ to be used as secondary standards. Artifacts include tiles and other stable reflectance materials such as Fluorilon™-99W, and other ‘artifact’ quality materials.
Most measurements are traceable to another artifact standard, but the techniques of measurement are traceable to NIST document 250-46 and/or ASTM Test Methods, which are listed on the calibration sheets. A 'calibration' refers to something that is directly traceable to a NIST/NRC certified primary standard, whereas a measurement is more traceable to a technique/test method.


